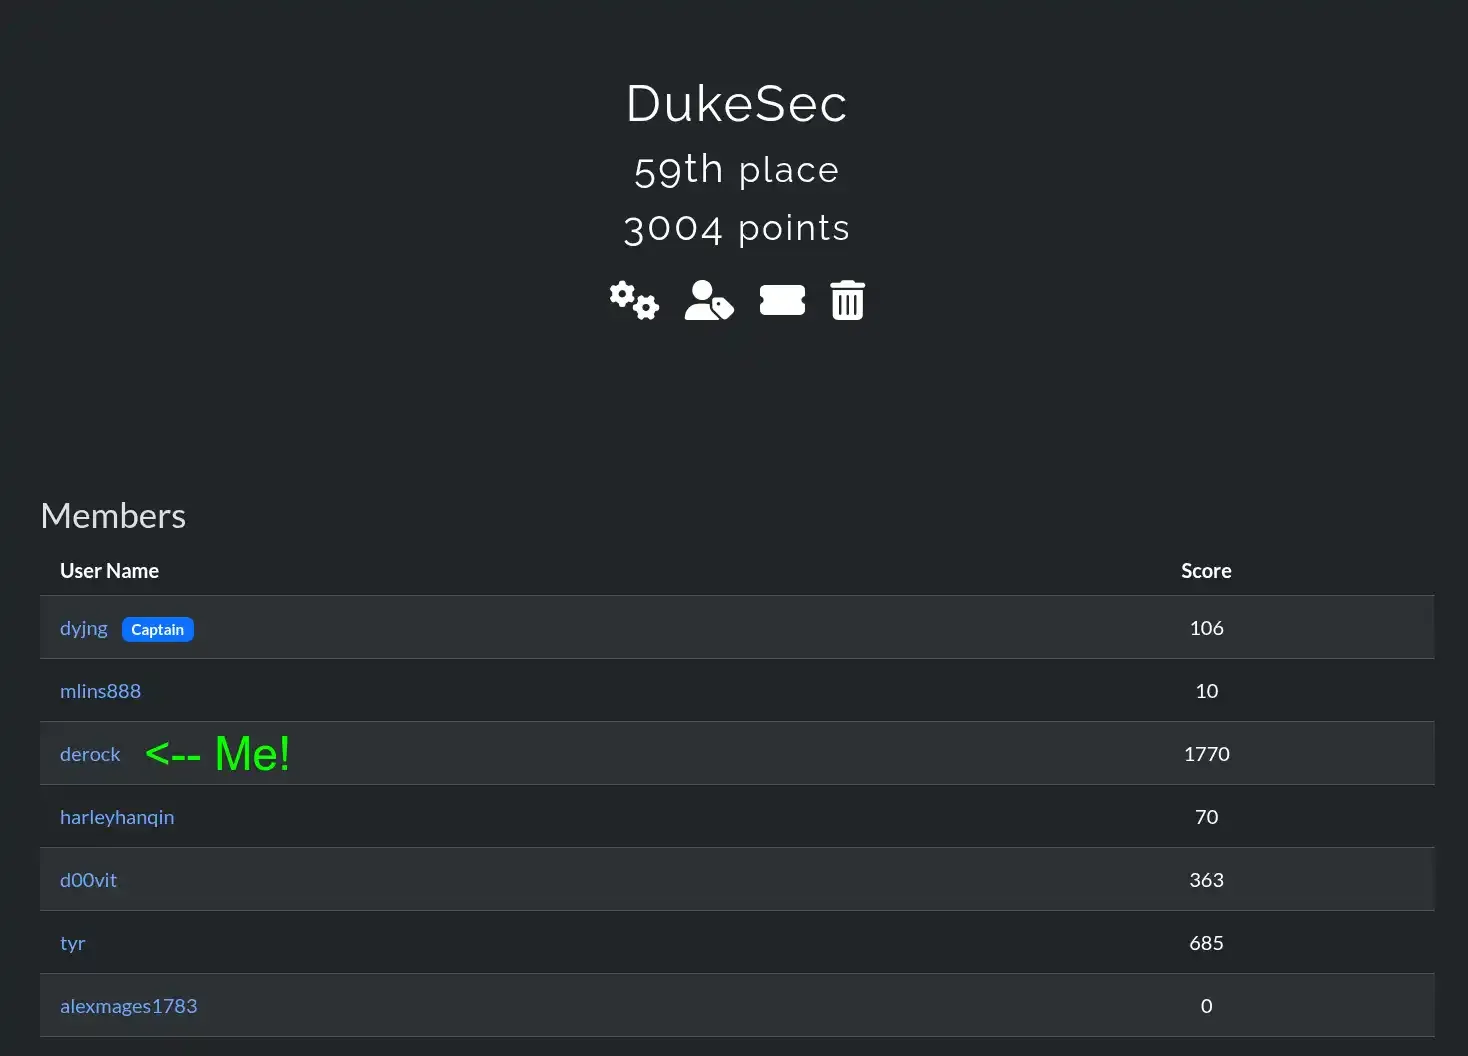
This fall, as part of the DukeSec club, I participated in the 2025
Sunshine CTF. CTFs (aka Capture the Flag) are a
competition where participants are faced with a set of cybersecurity challenges,
in which they try to “hack” the system and gain access to sensitive knowledge
(the flag). Our team placed 59th overall out of over 1,000 teams. With the
conclusion of the competition, I’ll be sharing my solutions, thought process,
and key takeaways.
We recently started a new CMS, we’ve had issues with random bots scraping our
pages but found a solution with robots! Anyways, besides that there are no new
bug fixes. Enjoy our product!
Fuzzing is NOT allowed for this challenge, doing so will lead to IP rate
limiting!
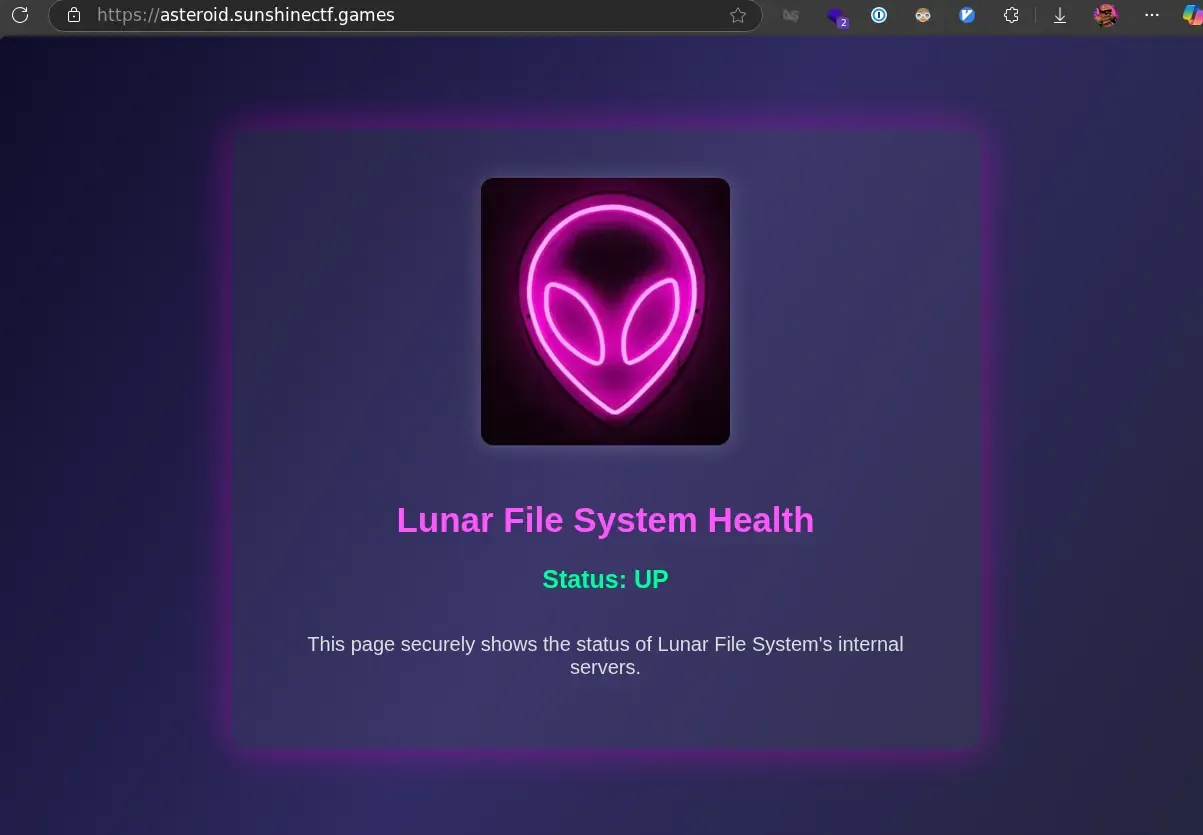
The homepage of this site really gives you nothing:
FIG. 2Homepage of the CMS
Based off the challenge description, it hints us towards checking the
robots.txt file. A file used by scrapers (like Google) to determine what pages
it can and cannot visit.
# don't need web scrapers scraping these sensitive files:
Disallow: /.gitignore_test
Disallow: /login
Disallow: /admin/dashboard
Disallow: /2FA
Great! Now we have a few pages we can check out. The login form seems like your
typical login page, and the dashboard is inaccessible without authentication.
But, there’s this .gitignore_test file. Let’s check that out.
# this tells the git CLI to ignore these files so they're not pushed to the repos by mistake.
# this is because Muhammad noticed there were temporary files being stored on the disk when being edited
# something about EMACs.
# From MUHAMMAD: please make sure to name this .gitignore or it will not work !!!!
# static files are stored in the /static directory.
/index/static/login.html~
/index/static/index.html~
/index/static/error.html~
I think our boy Muhammad might’ve forgotten to rename this file. This gives us
even more pointers! Many text editors leave out “swap” files which contain your
latest changes, even without you hitting save. This exists so that if your PC
crashes or you lose power, your edits can still be recovered by reading the swap
file. Let’s take a look at one of these files:
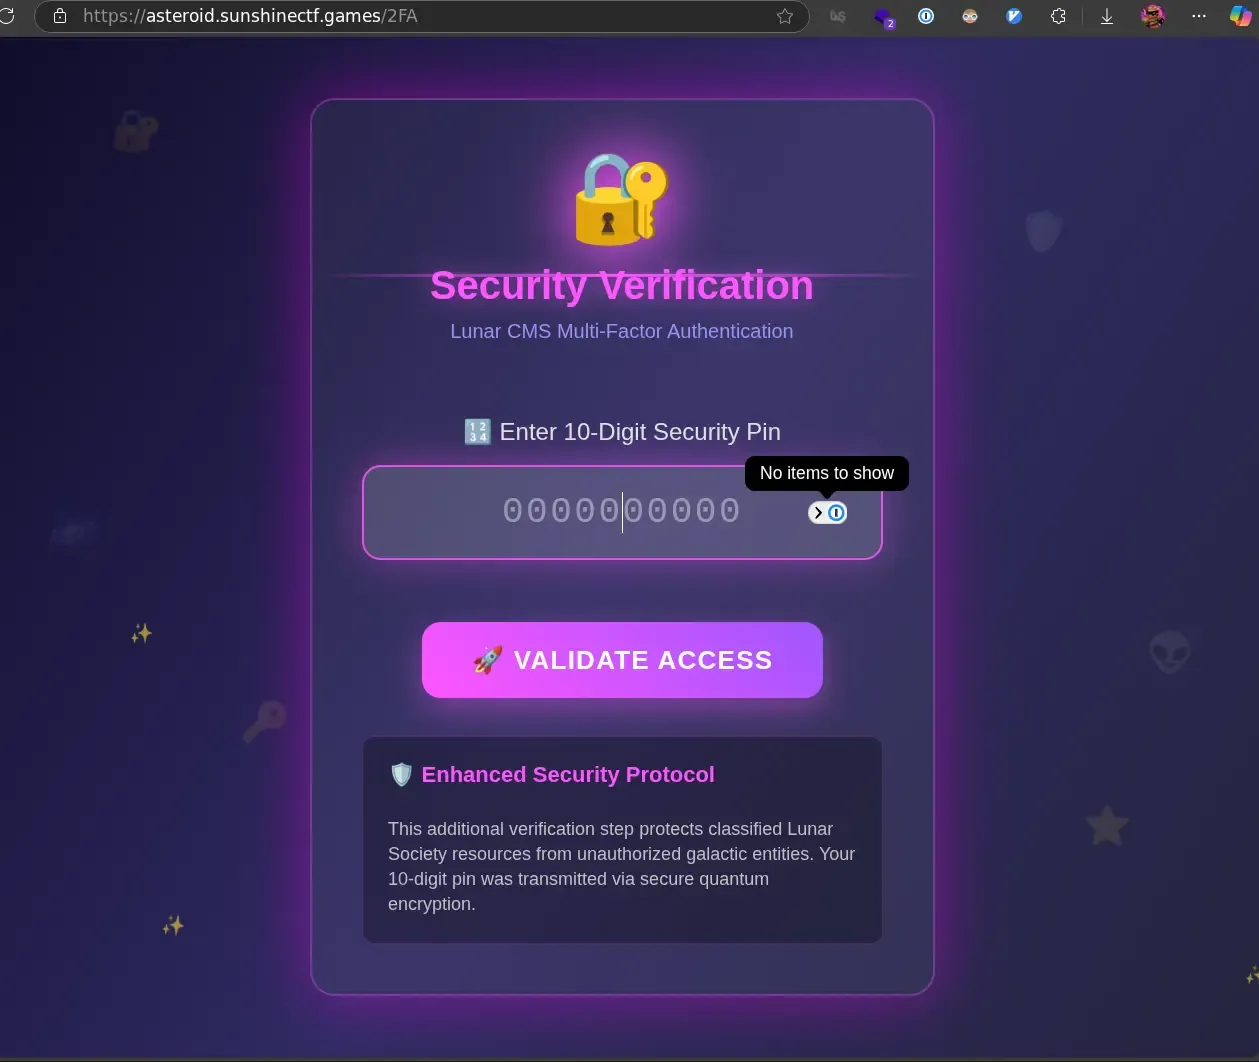
Inputting this into the login form we found earlier results in being redirected
to the 2FA page.
FIG. 3Security Verification 2FA page asking for 10 digits
Looking around the HTML for this code, I don’t immediately see any
vulnerabilities. But what if we can bypass this 2FA page? Remember the earlier
robots.txt file contained an /admin/dashboard route. If we visit this, we
get access the dashboard, even without entering valid 2FA credentials. Seems
like they forgot to enforce the 2FA page they created.
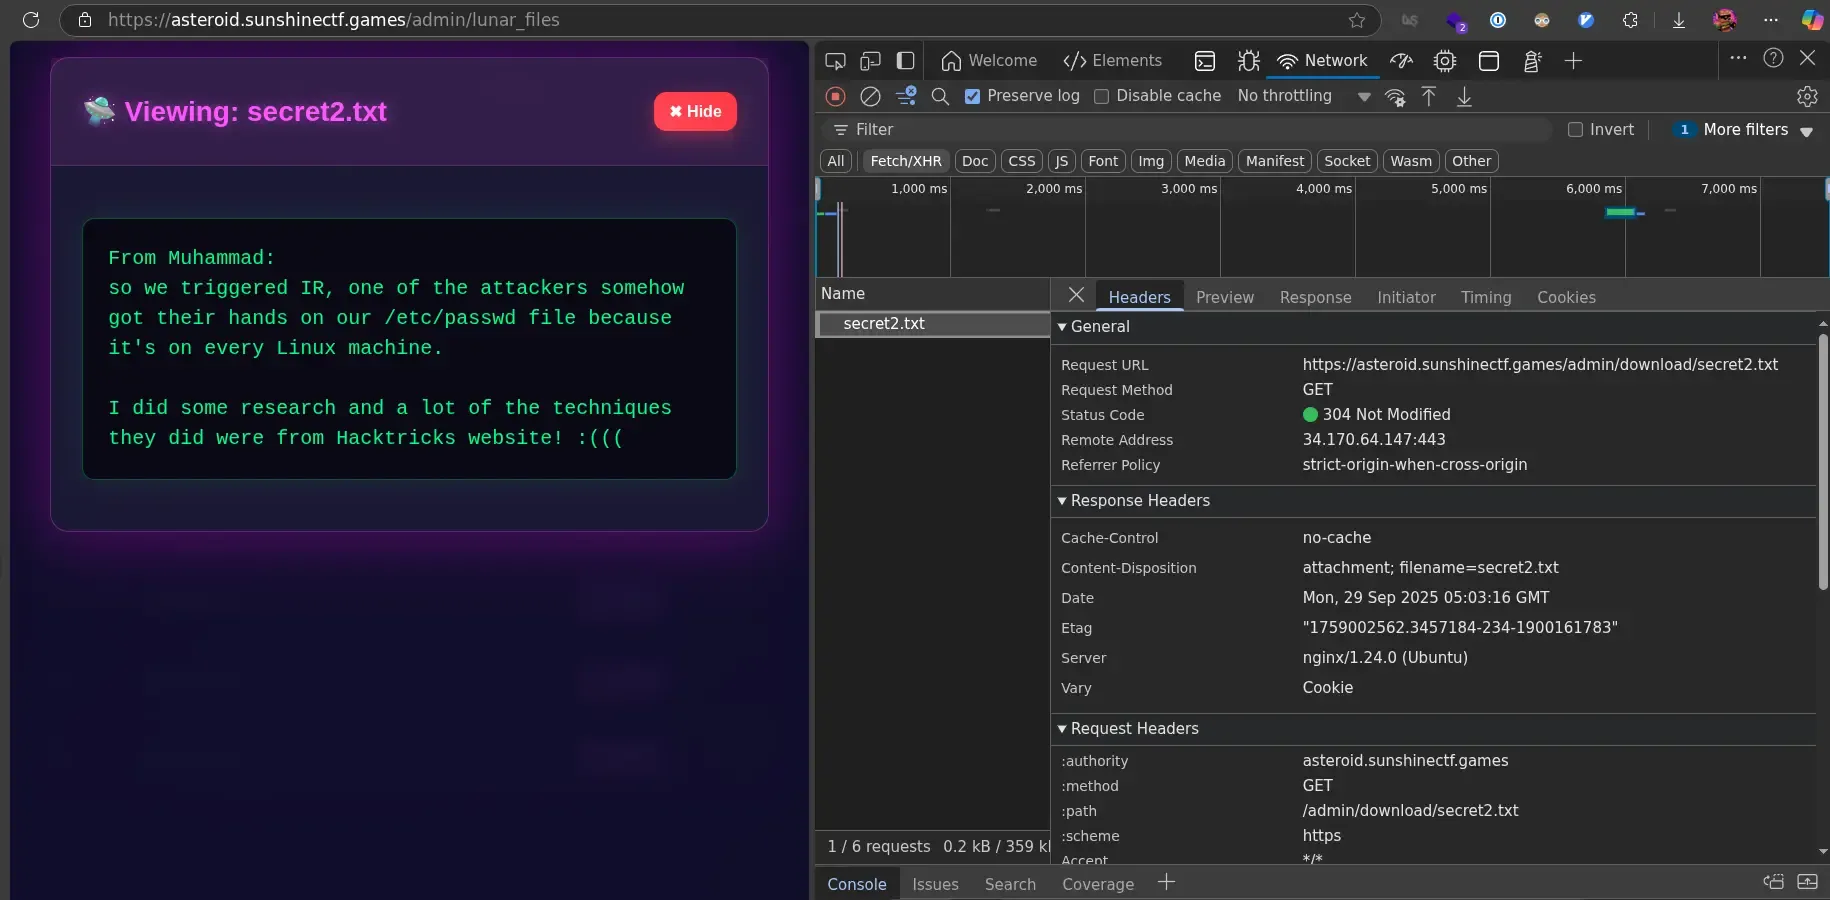
On this dashboard, we can visit the files page where we see a list of files in a
platform somewhat resembling Google Drive or other cloud storage solutions. With
inspect element, we can take a peek at how the page loads each file when we
click it.
FIG. 4Chrome webtools
It makes a request to
https://asteroid.sunshinectf.games/admin/download/secret2.txt where
secret2.txt is the name of the file.
The next order of business is to attempt an escape, getting access to files
outside the current directory. If we pass in /admin/download/../secret2.txt to
curl to make a request, curl thinks you intend to view /admin/secrets2.txt and
normalizes the path for you. In our case, we don’t want this, so we’ll use the
--path-as-is argument to tell curl to leave our URL as-is.
Let’s try to see if we can read a common Linux file like /etc/passwd. Since we
don’t know how deep into subfolders we are, let’s just be safe and add in a good
number of ../’s to be confident we can traverse all the way to the filesystem
root.
Ok, we got a NGINX error. NGINX is a popular reverse-proxy, sitting in front of
application servers to handle load-balancing or other features. Getting this
error means that our request isn’t even reaching the backend server. A bit of
digging later, and NGINX also comes with this same path-normalization feature
enabled by default. But unlike with curl, we can’t simply pass a flag to tell it
not to. We need to be a bit creative.
The matching is performed against a normalized URI, after decoding the text
encoded in the “%XX” form, resolving references to relative path components
“.” and “..”, and possible compression of two or more adjacent slashes into a
single slash.
Seems like NGINX will automatically normalize paths not only in the raw ../
form, but will also decode any URL-encoded segments. This means we can’t simply
URL-encode the path to bypass this:
As you can see, the URL-encoded version results in the same NGINX error. Based
off the documentation excerpt though, it seems like NGINX will only decode once.
So, what if we URL encode our path twice?
Another error, but this time it’s not NGINX! That means we are now talking
directly to the application server. No middleman blocking our requests. In the
response, there’s an
err_msg=%5B+Succession+of+'../../'+detected,+forbidden+%5D, which when
URL-decoded becomes:
“Succession of ’../../’ detected, forbidden”
So, it seems that the server has a check to find ../../ and deny any requests
with it. Based off the wording though, this is probably just a very simple
path.includes('../../') check. So, instead of using ../ we can change to
..//. With UNIX path’s, you can add as many / as you want without it
impacting the path. ../ = ..// = ../// = ..//// and so on.
And there it is! The /etc/passwd file of the application server.
Unfortunately, the flag isn’t located in here, but at least we know we have a
working path traversal exploit.
From here, it’s all about figuring out where this flag file is. From the passwd
file, I saw there was an unprivileged user with home directory of
/home/unprivileged (see last line of output). Using the exploit, I tried a
bunch of different paths:
/home/unprivileged/flag.txt
/home/unprivileged/flag
/home/unprivileged/.bash_history
All these searches yielded nothing. Let’s visit the website once again to see if
we can find any more details. After inspecting the file list page, I noticed the
following comment:
[...]
functionfetchFileContent(filename){
// no need ot URLEncode this is JS argument being pssed in,
// plug we already URLencoded via flask's | urlencode
constviewUrl=`/admin/download/${filename}`;
[...]
Flask is a popular web framework (or more formally, a WSGI) for python. With the
knowledge that the server runs python, we can try and search all the directories
for an app.py file, since that is typically what python dev’s like to name
their server entrypoint. Through the magic of the copy+paste command, I created
the following script:
All this script does is brute force different numbers of ..//app.py files.
Running it yields:
❯ ./test.sh
<!doctype html>
<html lang=en>
<title>Redirecting...</title>
<h1>Redirecting...</h1>
<p>You should be redirected automatically to the target URL:<a href="/admin/lunar_files?err_msg=%5B+Resource+Does+not+Exist!+%5D">/admin/lunar_files?err_msg=%5B+Resource+Does+not+Exist!+%5D</a>. If not, click the link.
<!doctype html>
<html lang=en>
<title>Redirecting...</title>
<h1>Redirecting...</h1>
<p>You should be redirected automatically to the target URL:<a href="/admin/lunar_files?err_msg=%5B+Resource+Does+not+Exist!+%5D">/admin/lunar_files?err_msg=%5B+Resource+Does+not+Exist!+%5D</a>. If not, click the link.
<!doctype html>
<html lang=en>
<title>Redirecting...</title>
<h1>Redirecting...</h1>
<p>You should be redirected automatically to the target URL:<a href="/admin/lunar_files?err_msg=%5B+Resource+Does+not+Exist!+%5D">/admin/lunar_files?err_msg=%5B+Resource+Does+not+Exist!+%5D</a>. If not, click the link.
<!doctype html>
<html lang=en>
<title>Redirecting...</title>
<h1>Redirecting...</h1>
<p>You should be redirected automatically to the target URL:<a href="/admin/lunar_files?err_msg=%5B+Resource+Does+not+Exist!+%5D">/admin/lunar_files?err_msg=%5B+Resource+Does+not+Exist!+%5D</a>. If not, click the link.
<!doctype html>
<html lang=en>
<title>Redirecting...</title>
<h1>Redirecting...</h1>
<p>You should be redirected automatically to the target URL:<a href="/admin/lunar_files?err_msg=%5B+Resource+Does+not+Exist!+%5D">/admin/lunar_files?err_msg=%5B+Resource+Does+not+Exist!+%5D</a>. If not, click the link.
<!doctype html>
<html lang=en>
<title>Redirecting...</title>
<h1>Redirecting...</h1>
<p>You should be redirected automatically to the target URL:<a href="/admin/lunar_files?err_msg=%5B+Resource+Does+not+Exist!+%5D">/admin/lunar_files?err_msg=%5B+Resource+Does+not+Exist!+%5D</a>. If not, click the link.
import os
withopen("./FLAG/flag.txt","r")as f:
FLAG= f.read()
from flask import*
from flask_login import(
LoginManager,
login_user,
login_required,
logout_user,
current_user,
)
from flask_wtf.csrf import CSRFError
# blueprint stuff:
from models import*
from admin import admin_blueprint
from index import index_blueprint
# ^^ this is what I meant by:
# "the dir is"
# treated as a package in a sense.
# global
from extensions import*
# clean up the login page and make it functional then we can start piecing together the LFI dashboard
<p>You should be redirected automatically to the target URL:<a href="/admin/lunar_files?err_msg=%5B+Resource+Does+not+Exist!+%5D">/admin/lunar_files?err_msg=%5B+Resource+Does+not+Exist!+%5D</a>. If not, click the link.
<!doctype html>
<html lang=en>
<title>Redirecting...</title>
<h1>Redirecting...</h1>
<p>You should be redirected automatically to the target URL:<a href="/admin/lunar_files?err_msg=%5B+Resource+Does+not+Exist!+%5D">/admin/lunar_files?err_msg=%5B+Resource+Does+not+Exist!+%5D</a>. If not, click the link.
So, the 3rd command from the bottom got us an actual python file! That means
that the python file is located at ..%252F%252F..%252F%252F..%252F%252Fapp.py
or, decoded, ../../../app.py.
Looking at the code, we can see the flag gets loaded from ./FLAG/flag.txt.
withopen("./FLAG/flag.txt","r")as f:
FLAG= f.read()
So, combining the path of the script and the relative path of the flag, we get:
../../../FLAG/flag.txt. Let’s double up the slashes and URL-encode it twice to
get past all the blocks:
Avoid letting user’s input parts of your filesystem paths whenever possible,
only use trusted data. If you absolutely must, do not rely on simple sanitation
or validation methods like checking for ../ as your only line of defense. In
python, the pathlib library has many utilities to ensure a provided path is
under a desired safe directory, throwing an error if the resolved path ends up
being a higher level directory. Similarly, Node.JS provides provides the path
library to aide with safe path manipulation.
I got tired of creating webhooks from online sites, so I made my own webhook
service! It even works in outer space! Be sure to check it out and let me know
what you think. I’m sure it is the most secure webhook service in the
universe.
A server is a privileged resource, often connected to private networks with
database servers and internal microservices. If an application server ever needs
to make arbitrary requests, it’s integral to check where that request is going
to ensure the user can’t access internal services.
This challenge provided the source to the server (src.zip), which is not
atypical as many applications nowadays are open-source, with code available on
platforms like GitHub or Gitlab.
The first thing that jumped out in the server code (/src/app.py) is where the
flag is located:
In this snippet, the server starts a new thread which creates it’s own HTTP
server (HTTPServer(('127.0.0.1', 5001), FlagHandler)) on port 5001 with
handler defined as FlagHandler. This server is very simple, waiting for
requests with path /flag and sending the flag back. This server is bound on
the loopback address (127.0.0.1), so normally it cannot be access from outside
the server, mimicking a typical private resource.
So, now we know the goal: try to exfiltrate the flag from
http://127.0.0.1:5001/flag.
The question is, how can we do that? Let’s first understand what this service
is. The challenge name and description state this is a “webhook” service.
Webhooks are a way for applications to notify each other and send messages.
Take payment for example, when you purchase a good using PayPal, somehow the
shop you are purchasing it from needs to know when you have finished paying via
PayPal. This can be achieved using a webhook. Once PayPal confirms your payment
was successful, it can send a notification to the shop’s server through a
webhook. Something like: POST myshop.com/api/payment-successful with data
about the purchaser.
In this CTF problem, the webhook service allows you to specify a target URL and
a name. The name isn’t very useful for our purposes, but setting a target URL
is. Imagine we set it to http://127.0.0.1:5001/flag. Now, whenever we make the
webhook request, the server will request that loopback URL and voila, we can get
our hands on that flag data.
Unfortunately though, it seems as the developers have already thought of that!
If we attempt this, we get an error: IP "127.0.0.1" not allowed. Let’s dive
into how this works on the server code:
defis_ip_allowed(url):
parsed =urlparse(url)
host = parsed.hostname or''
try:
ip = socket.gethostbyname(host)
exceptException:
returnFalse,f'Could not resolve host'
ip_obj = ipaddress.ip_address(ip)
if ip_obj.is_private or ip_obj.is_loopback or ip_obj.is_link_local or ip_obj.is_reserved:
returnjsonify({'url': url,'error':'something went wrong'}),500
Whenever we make a request, the server passes the URL through the
is_ip_allowed function. This function checks if the IP is private, loopback,
link-local, or reserved. Basically, only allowing IPs that are public, which
does not include 127.0.0.1. The code here seems robust as well, using existing
python utilities for resolving and checking the IP.
After passing this check, all future code assumes the IP is good and makes the
request using the original URL provided. Sounds good right? Well, that’s exactly
where the problem is. This is a classic time of check vs time of use attack.
Imagine a scenario where we give it a domain we control, lets call it
attacker.com. We’ll make the domain first point to some real public IP—lets
say 1.1.1.1. The is_ip_allowed(...) function runs, resolves the domain, and
finds the 1.1.1.1 IP. This passes the check.
Now, immediately after, we’ll change the domain to point to 127.0.0.1. Since
no other parts of the code check the IP again, the requests.post(...) line
will happily request 127.0.0.1 and send us back that data.
We don’t have to imagine this scenario, because this is very possible using a
service like rbndr. This app randomly sends
back one of two IP addresses, so by defining a domain that randomly responds
with 127.0.0.1 or 1.1.1.1, if lucky, we can pull off this attack exactly
like described above.
So, how can you prevent a vulnerability like this?
Instead of passing the original user’s URL into the requests function, the
resolved IP address should be stored and used instead. This way, you are
absolutely sure that the same validated IP will be the one that your server
reaches out to. To ensure proper routing, the HTTP Host header should be set
to the hostname of the user’s URL.
Furthermore, consider proxying all outbound requests through another server or a
VPN provider to prevent leaking your server’s IP, especially if your app is
behind a WAF like Cloudflare.
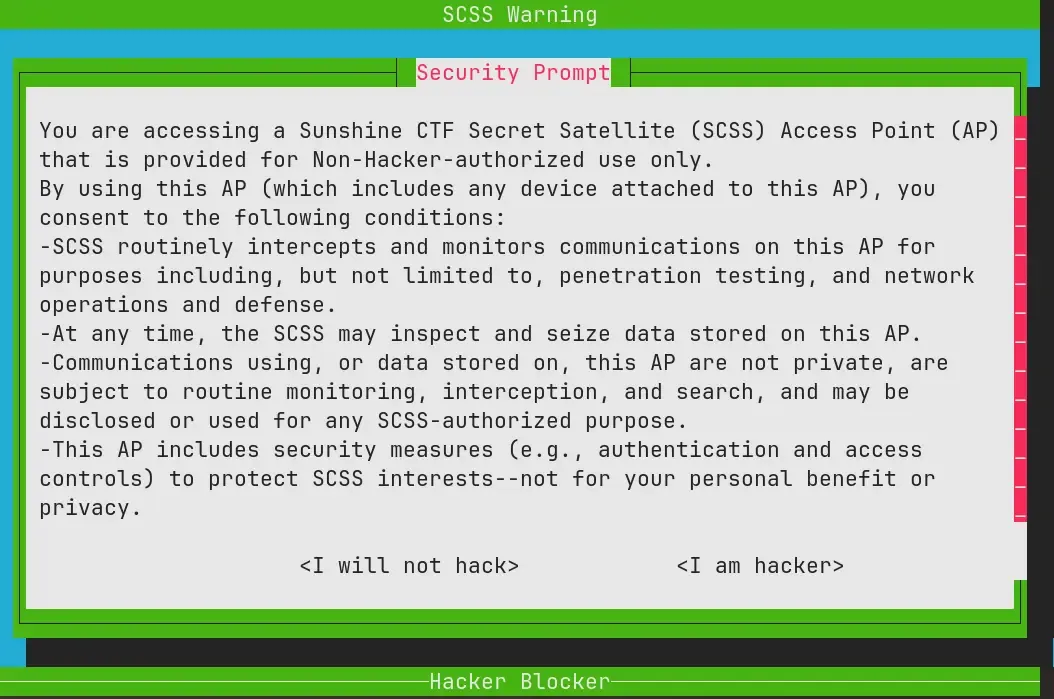
This challenge doesn’t provide any files, only a command to access the
satellite’s terminal. Executing the socat command, we are presented with a
menu:
FIG. 5Terminal window showing a security prompt
Pressing “I am hacker” presents an access denied screen and kicks you out.
Clicking “I am not a hacker” shows a popup saying “Hacking has now been
DISABLED!” This page gives a major hint too: “It was different BEFORE, but NOW
you cannot hack this system.”
So, there’s likely something between those two menus that changed. Let’s dive
deeper.
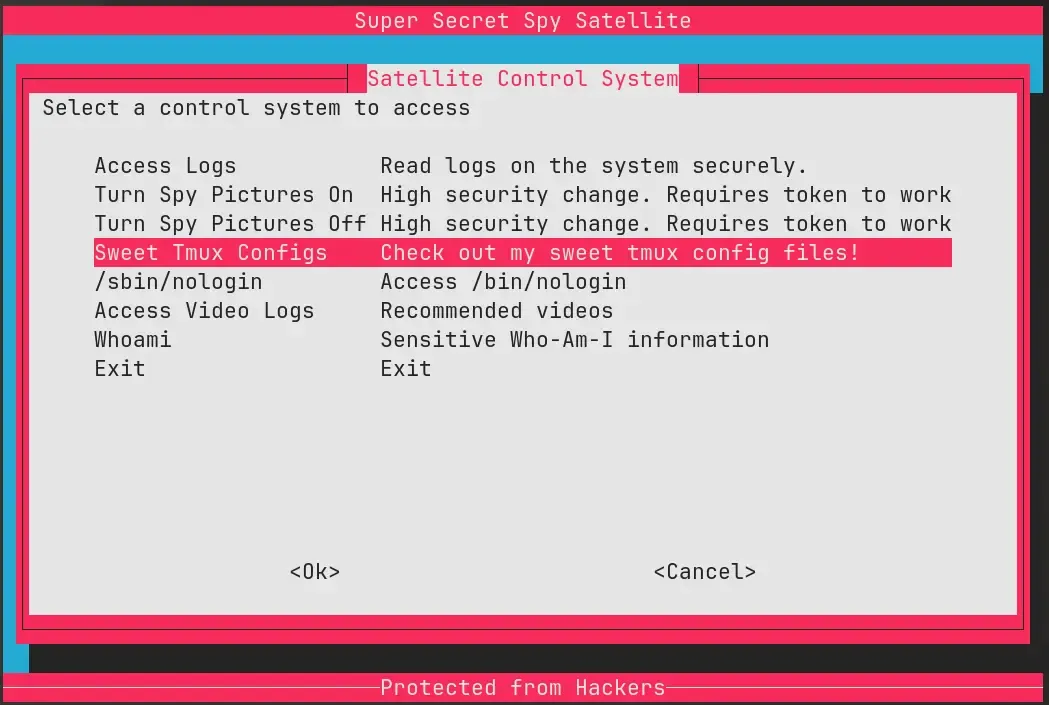
Scrolling through the TUI’s elements, there’s a section labeled “Sweet Tmux
Configs”, which, like the name suggests, displays the tmux configs used in this
app.
FIG. 6TUI with Sweet Tmux Config option selected
Tmux is a terminal multiplexer. It allows you to run multiple shells in one
terminal window, and jump between them. Think of it like an “alt-tab” system for
a terminal.
When in the “Sweet Tmux Configs” menu, the server provides three config files:
Hacking TMUX: this must be for the “I am a hacker” menu previously discovered.
Default TMUX: the config used when you initially access the spaceship.
Secure Satellite TMUX: used when you hit “I am not a hacker” and are dropped
into the “secure” menu.
Looking through the configs, there’s one line noticeably missing from the
default and hacking TMUX config:
unbind-key -a
In tmux, unbind-key -a unbinds all default keyboard shortcuts. By default,
commands like Ctrl + b c launch a new shell. Without this line, all default
commands are enabled.
So, let’s test this out. If we exit and re-establish the connection (and thus
are now back to the default tmux config), we can try out some tmux shortcuts. If
we press Ctrl + b c, the window flashes for a second, before presenting the
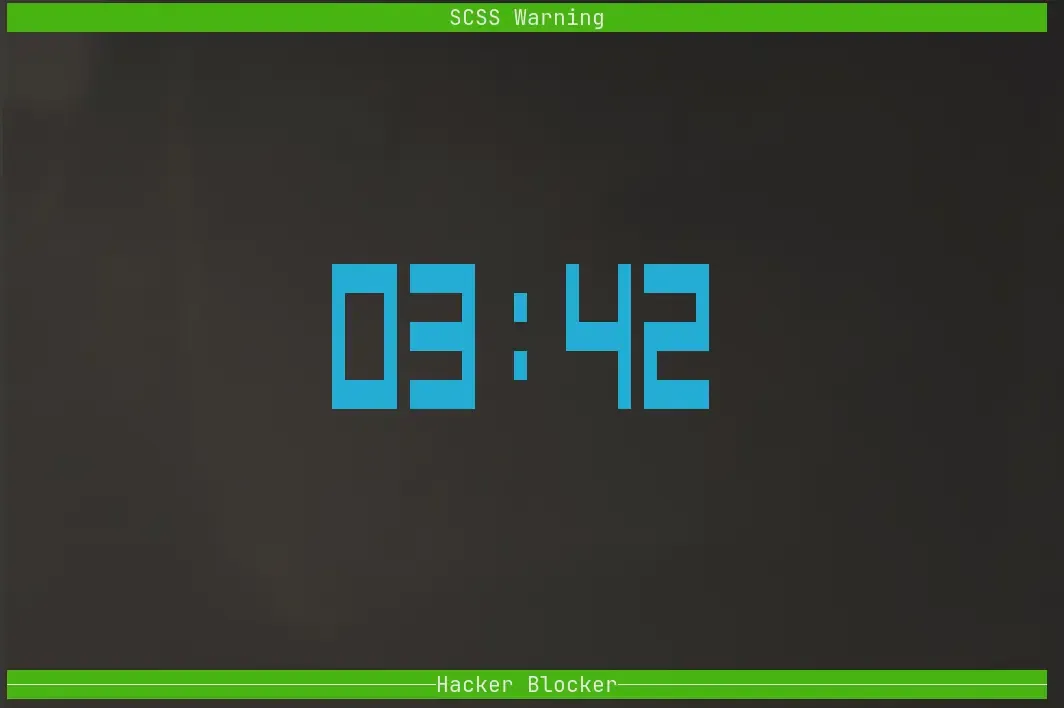
menu again. If we press Ctrl + b t, we get the default tmux clock.
FIG. 7Tmux clock saying 03:43
Ok, so it seems like tmux commands work! But, trying to open a new shell just
drops you back into the same menu again, instead of opening an actual shell.
Fortunately for us, tmux has multiple ways to execute commands! Let’s go through
them: (all of these commands are prefixed by ctrl + b as that puts tmux into
command mode)
:split-window '/bin/bash' - nope, drops you back into the main window again.
:split-window '/bin/sh' - even the sh shell puts you back to the main
window.
So, if we can’t get access to an actual shell, lets just try something simpler:
running a single command:
Wow, that worked! We can individually run commands using tmux’s run-shell
command. In the directory listing there’s a cat-flag binary. Just run that
with :run-shell './cat-flag' and we get the flag!
So, lessons learned?
Before using an application in production, make sure you fully understand all of
it’s features! Tmux here might seem like a good idea since it lets you set
custom title bars and set other decorative features, but it does way more than
just decoration!
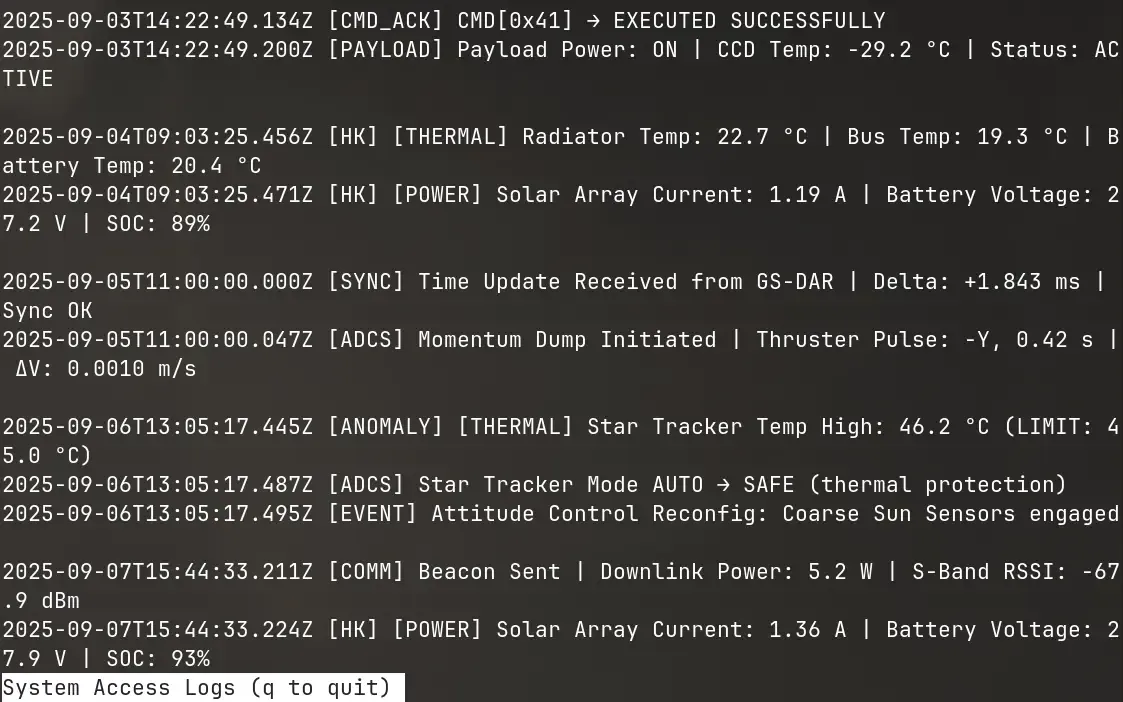
This one is very similar to the previous one, dropping us into a satellite menu,
but missing is any hint of tmux. Reading the problem statement, it makes a
comment about the log viewer and the expression “less is more!”.
FIG. 8Less menu showing satellite logs
In many Linux distributions, less and more are both commands to paginate
files, so you can scroll through them. If you were to cat a really long file,
all the text would zoom past your terminal screen and you’ll only get to see the
bottom. Less and more let you scroll and jump through the files.
But the less command can do way more than that. If you press v for example,
it will open the file for you in an editor. If you type :! you can run
commands (i.e. :!ls -lah).
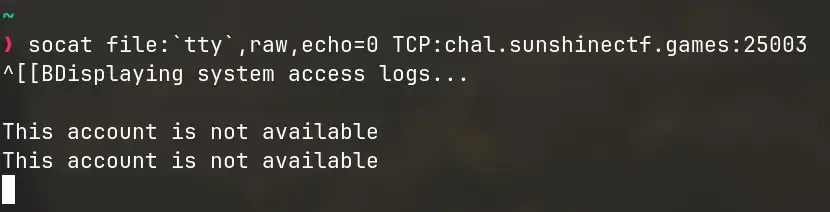
FIG. 9Terminal showing "This account is not available"
Unfortunately, trying to execute commands that way doesn’t work! Instead, it
closes the less menu temporarily and shows “This account is not available”.
Hmm, there must be another way. Turns out, yes, via piping.
Piping refers to redirecting the output of one command or file into another,
like passing a paper along between different commands. In less, you can pipe the
contents of a portion of the buffer (aka a selection of text) into a file or
into another command. This is useful if you want to save a portion of a long
file into another file.
The procedure goes like this:
Create a mark named a (can be any letter) using ma.
Move somewhere else. All text between that mark and your new location will be
selected.
You can now pipe (pass) this content to another command using the | key,
for example: |a wc -l. (a here denotes that we named the mark “a”).
FIG. 10Empty screen with just "!done (press RETURN)"
The wc -l command is supposed to count the number of lines when passed text,
but the terminal output shows nothing… Strange. The ‘done’ message at the
bottom was encouraging, suggesting the command ran even though we couldn’t see
the output. It’s likely that the output of the command went to the standard
output, instead of being passed back to less.
If we recall, when we tried to run commands using :!command, it closed out of
less to show us the message. If we use that here, and just run anything, we can
temporarily exit less to see the standard output.
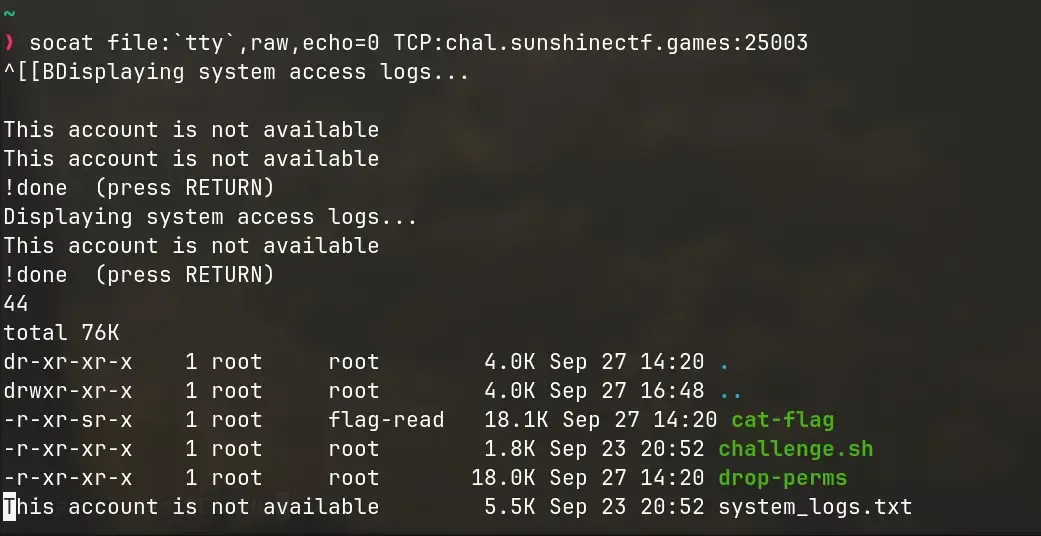
So, let’s try that mark thing again, this time running |a ls -lah so we can
see the files in this directory.
FIG. 11Terminal showing the contents of the current directory
There it is! The wc -l command we ran earlier, and the output of ls -lah.
Again, there’s a cat-flag command we can run. By running that through the same
method, we can get the flag.
Lessons learned?
Again, make sure you fully understand the technology you use when building
applications. Less, on it’s own, sounds like a great tool. Instead of having to
write your own software to paginate long files to present to the user, you can
just use one that’s built into almost every distribution. But, unlike the name,
less does have a lot of features that can potentially be exploited if you’re
not careful!
A satellite has fallen from orbit, and miraculously, it is still operational.
It appears to be running on a RAD-EAR-3 CPU, which is known for its
reliability in space applications. The satellite has a handful of program
cartridges that it can swap between (like a jukebox), and one of them is
labeled “hello”. Can you figure out how to run it? We need the satellite’s
serial number!
PEGASUS file for this challenge
CanYouHearMe.peg
Core PEGASUS v3 files:
runpeg
libear.so
libeardbg.so
Documentation for v3:
EAR_EAR_v3.md
PEGASUS.md
How to run a PEGASUS file:
runpeg <file.peg> [--debug] [--verbose] [--trace]
There are more options you can find with runpeg —help :)
This one was quite simple, as it was just to test that you have correctly setup
your environment.
./runpeg CanYouHearMe.peg
And that would give you the flag. For some context, PEGASUS is a custom
instruction set made specifically for this competition. They provided documents
on the ISA including the registers available and the opcodes.
As the competition progressed, the CTF hosts uploaded more PEGASUS challenges,
but at the time that I was solving them, they had not yet released other
challenges.
Visiting this site, we see a simple shop site: a list of products, and page for
each product listing it’s basic details.
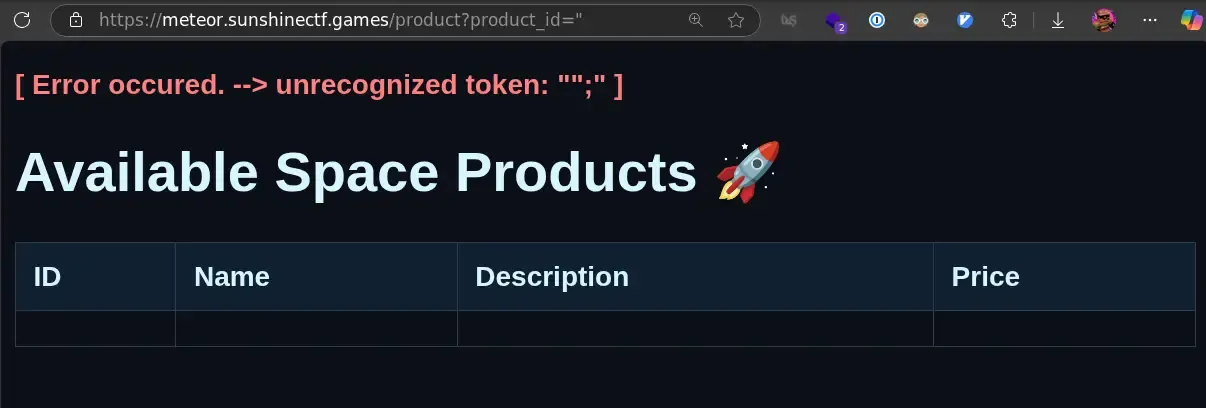
But notice the URL when you visit a product page: /product?product_id=1. With
some curiosity, let’s see what happens if we input something that’s not an
alphanumeric character, like ".
FIG. 12An SQL error
Interesting, we get an SQL error. This means the server is vulnerable to an SQL
injection. This basically means we can modify the SQL query however we want.
Given the content on the product page, we can get a sense that the product’s SQL
query likely takes the form of:
SELECT
id, name, description, price
FROM
products
WHERE
id = {user input here} AND released =1
LIMIT1;
Of course, we don’t actually know the column names or the table name, but we can
guess. Let’s try finding the flag by searching through the table for anything
with sun{ in the description (since the format of the CTF flags for this
competition are sun{flag_secret_here}).
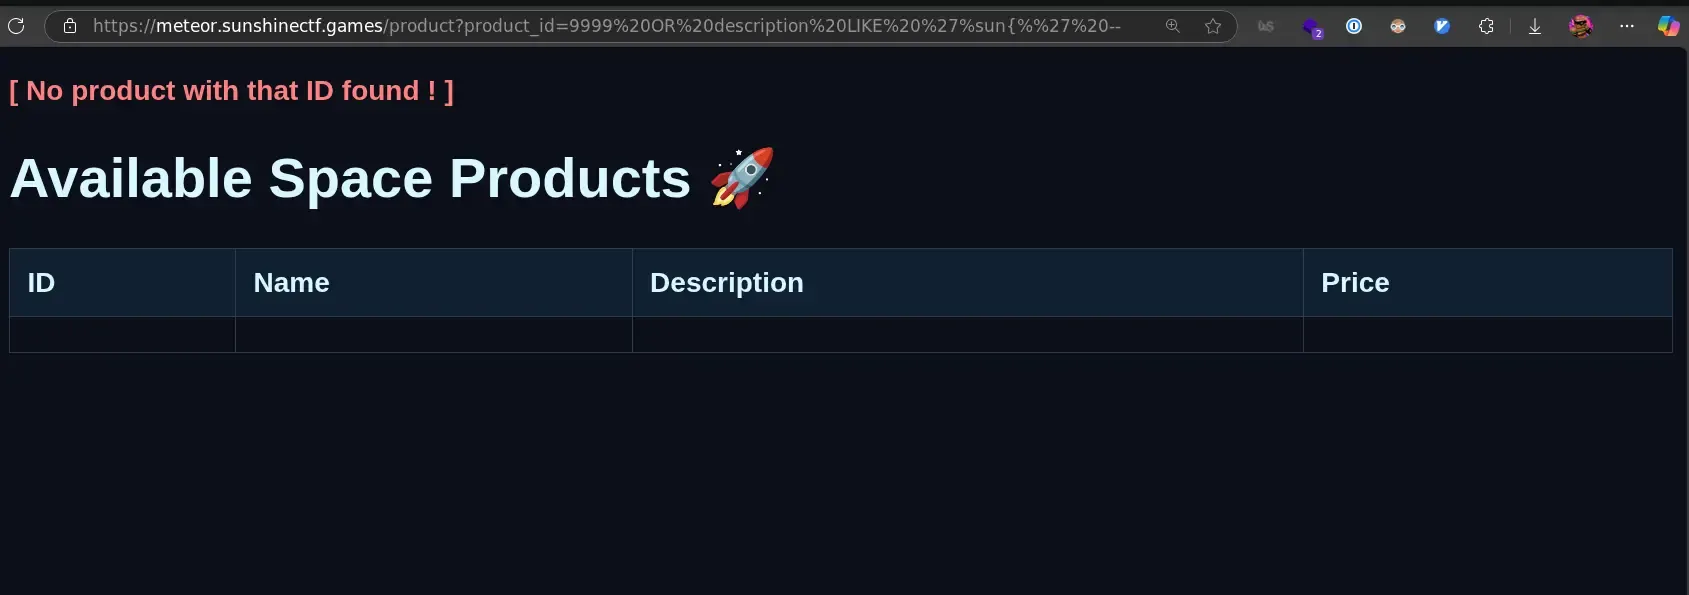
We can do this by crafting an SQL query like this:
9999ORdescriptionLIKE'%sun{%'--
Since the server doesn’t sanitize the input, this will directly get interpolated
to:
SELECT
id, name, description, price
FROM
products
WHERE
id =9999ORdescriptionLIKE'%sun{%'--
LIMIT1;
Testing that out, we get
FIG. 13No results
Well… lets try a few different combinations to see if we can uncover anything:
9999 OR name LIKE '%flag%' -- nothing
9999 OR name LIKE '%sun%' -- still nothing…
9999 OR 1=1 LIMIT 99999 -- maybe we can list them all out? no.. didn’t work.
9999 OR name LIKE '%flag%' -- no results once again
Based on the hint, we know that the flag is an unreleased product. Let’s see if
we can filter for that with:
9999OR released =0--
Here, I just took a wild guess with released being the name of the column.
That guess lands short, with an error saying this column does not exist.
In SQL, we can also use numbers to reference columns, instead of their names.
Let’s try to count how many columns this table has.
9999 OR 1=1 ORDER BY 01 works
9999 OR 1=1 ORDER BY 02 works as well
9999 OR 1=1 ORDER BY 03 still works, we have at least 3 columns.
9999 OR 1=1 ORDER BY 04 also works
9999 OR 1=1 ORDER BY 05 fails!
When ordering by the 5th column, we get
[ Error occured. --> 1st ORDER BY term out of range - should be between 1 and 4 ]
This error here reveals that we have exactly four columns. Based off the
information on the site, it’s likely the ones we identified earlier: id, name,
description, price. That leaves no extra columns to identify mark products as
released or unreleased. That means the unreleased products are likely in a
different table altogether.
This time, lets be a little more methodical with this, rather than
brute-forcing. Many SQL servers have a table that stores the columns for other
tables. In MySQL and PostgreSQL, we can query the information_schema.tables
table for this. Let’s craft a query to do that using the UNION keyword to
combine this query into the existing one:
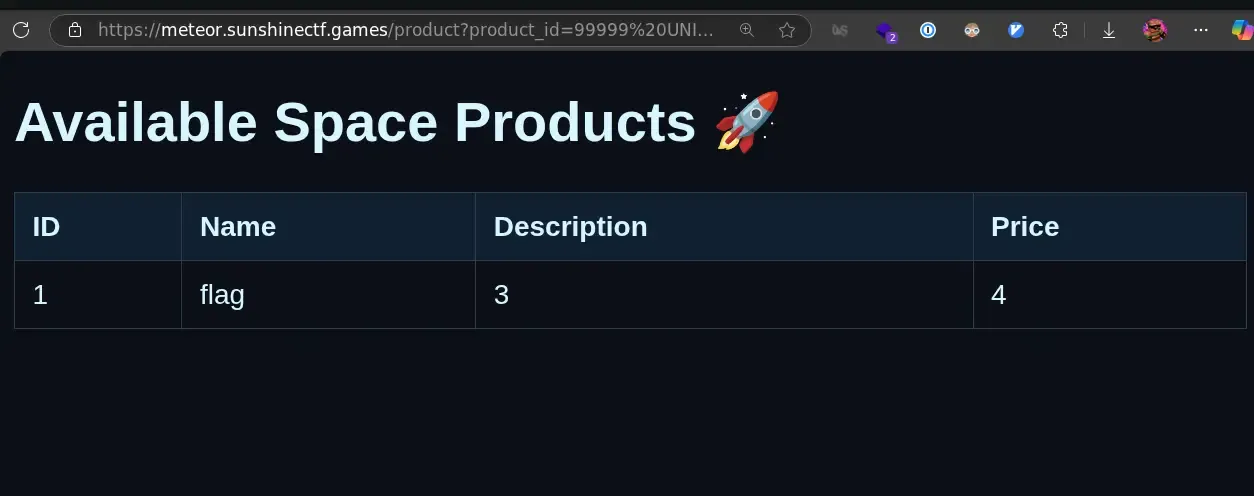
There we go! We see that a flag table exists. Now, we just need to know what
columns exist in that table so we can query it. Thankfully, sqlite also stores
that in sqlite_master:
CREATETABLEflag ( id INTEGERPRIMARY KEY AUTOINCREMENT, flag TEXTNOT NULLUNIQUE )
Ok, now we know that there’s an id column and a flag text column. Final step
is to query that:
99999UNIONSELECTNULL, flag, NULL, NULLFROM flag --
And that’s it! we get our flag.
To developers:
SQL Injections are one of the oldest vulnerabilities on the web. Always use
parameterized queries (prepared statements), which treat user input as data, not
as executable code. This is the most effective way to prevent SQL injection
vulnerabilities.
NASA received a notification from their ISP that it appeared that some
copyrighted files were transferred to and from the ISS (Guess astronauts need
movies too). We weren’t able to recover the all of the files, but we were able
to capture some traffic from the final download before the user signed off. If
you can help recover the file that was downloaded perhaps you can shed some
light on what they were doing?
Attachments: evidence.pcapng
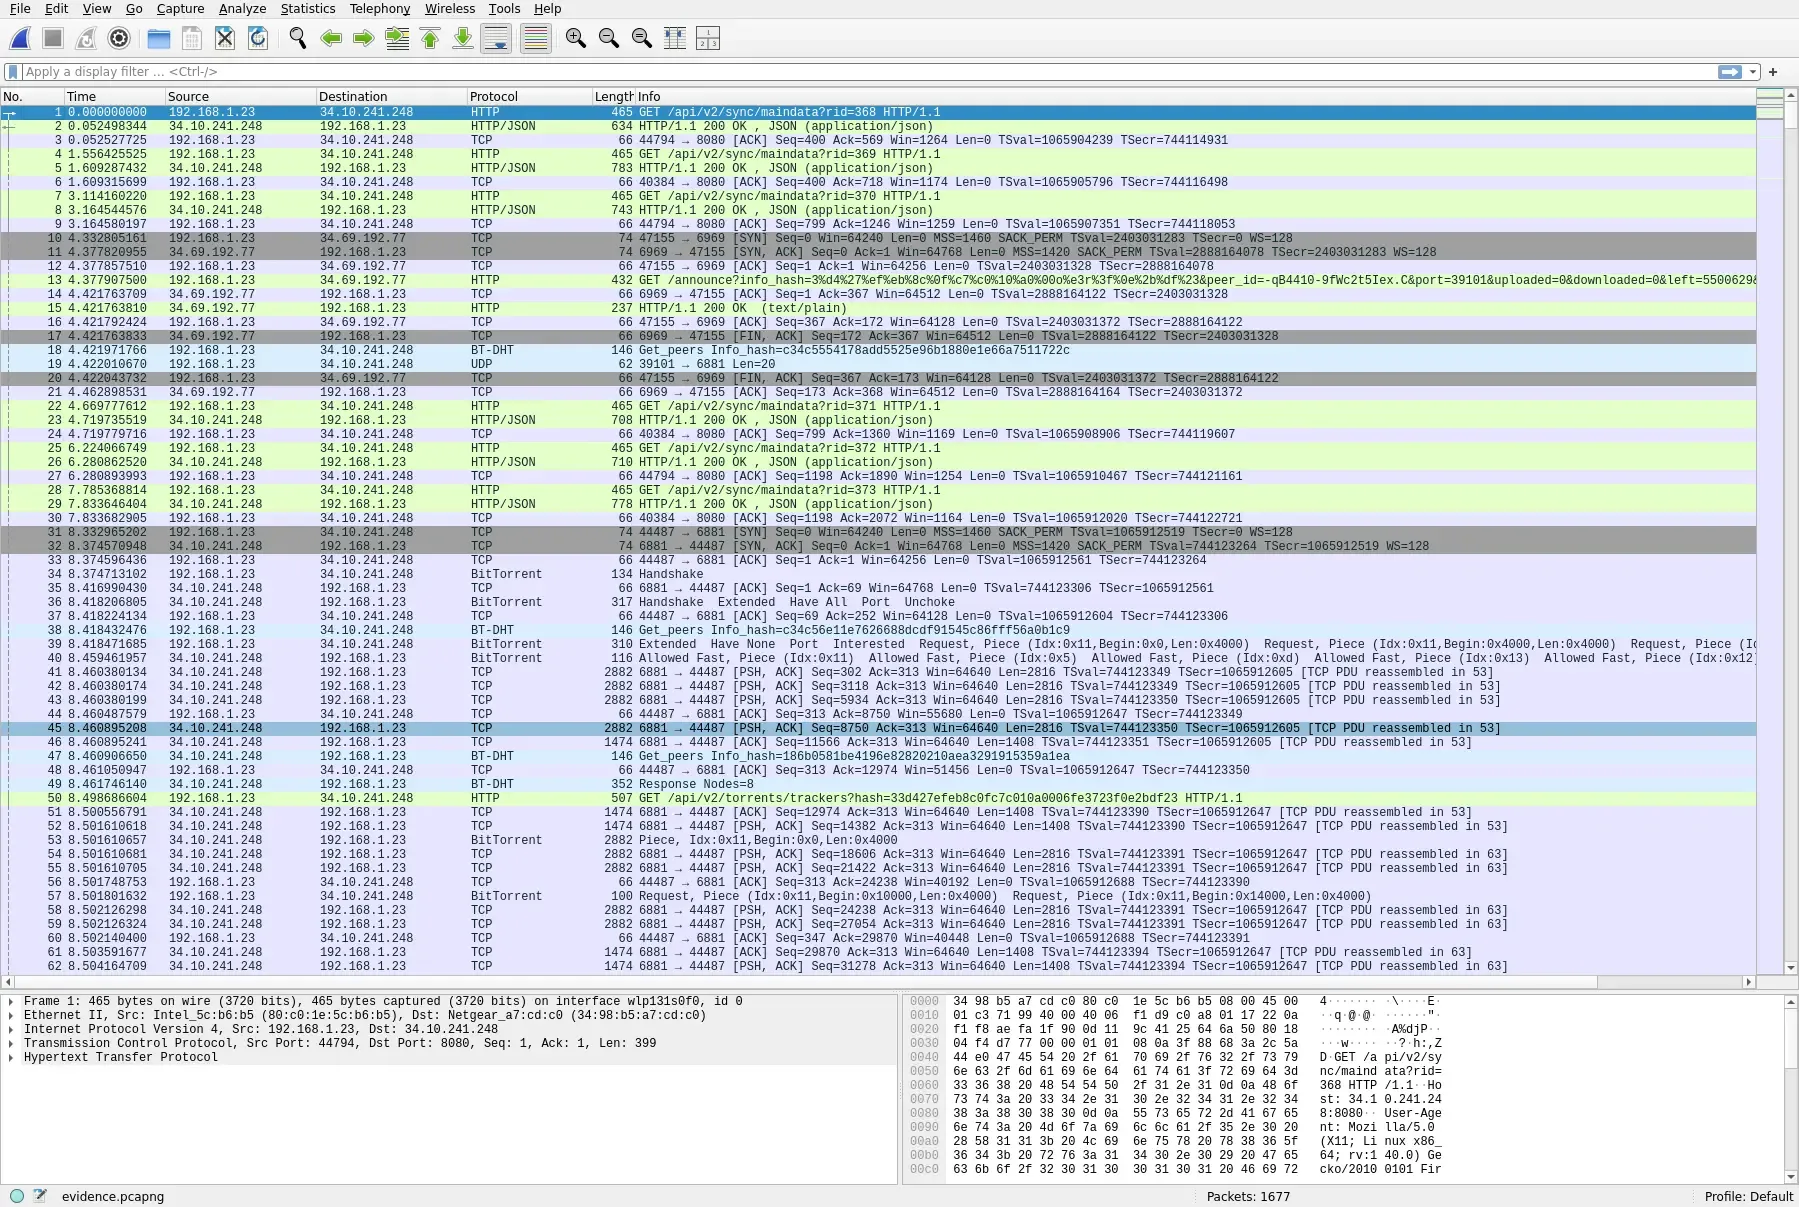
In this problem, there is an attached .pcapng file. A pcap is a packet
capture, and we can use a tool like Wireshark to inspect the contents.
FIG. 15Wireshark showing the contents of the pcapng file
What immediately stands out in the list of connections are the rows with
BitTorrent label. BitTorrent, and torrenting in general, is a very popular
peer-to-peer file-sharing protocol, often used to share copies of
Linux ISOs.
The standard BitTorrent protocol includes no encryption, so from this packet
capture, we can reassemble the file being downloaded:
This command uses the
tshark
command to decode the pcap file, select all packets with bittorent data, and
save the index of the piece and the piece’s data. When torrenting it is common
to receive chunks of the target file out-of-order, so the index is used to
reconstruct the file in the original order.
This command outputs a list of base64-encoded data chunks, which we redirect
into a pieces file. A final python post-processing script can be used to sort
the chunks by index, and decode the base64 into the original binary.
#!/usr/bin/env python3
import sys
# A dictionary to hold the pieces of the file.
# The keys will be the hex indices and values will be the byte data.
pieces ={}
input_filename ='pieces'
output_filename ='torrent.out'
try:
# The file 'pieces' is expected to contain tab-separated lines:
# <hex_index>\t<hex_data_with_colons>
withopen(input_filename,'r')as f:
for line_num, line inenumerate(f,1):
line = line.strip()
ifnot line:
continue
# Split the line into index and data
try:
idx, data = line.split('\t')
exceptValueError:
print(f"Warning: Skipping malformed line {line_num}: '{line}'")
continue
# convert hex to bytes
hex_string = data.replace(':','')
byte_data =bytes.fromhex(hex_string)
# add the data into the specified index
if idx in pieces:
pieces[idx]+= byte_data
else:
pieces[idx]= byte_data
exceptFileNotFoundError:
print(f"Error: The input file '{input_filename}' was not found.")
sys.exit(1)
ifnot pieces:
print("No data was loaded from the input file. Exiting.")
print(f"Successfully reassembled the data into '{output_filename}'.")
With that, we get a torrent.out file. Using the linux file command, we can
determine the type of file this is:
Terminal window
❯filetorrent.out
torrent.out:PDFdocument,version1.6,484page(s)
PDF. Open it in the browser, and there’s the flag!
FIG. 16Copyright Law of the United States book with the flag typed on the second page.
What does this mean?
When transferring sensitive material, do not use unencrypted file transfer
methods. As you can see, it’s trivial for someone in the middle to take a packet
capture and decode whatever is being sent.
Conclusion
Thanks for reading this far! I had a lot of fun trying these challenges out.
This CTF is my first ever official CTF, and I think I performed pretty well!
A recurring theme was the danger of hidden complexity in seemingly simple tools,
a lesson that applies far beyond CTFs. Commands like less and apps like tmux
may seem straightforward and single-purpose, but have many fronts that all need
to be checked when building an application around them.